| |
| |
We do very little FirstClass client training because it is really very intuitive. What we do mostly is hold sessions that point out some of the more subtle features of the Client. I am doing a session in our school district this week and have put together a document that I will be providing our users. I thought that some of you might be interested in this so feel free to copy, revise and reuse. Some of the content here is more specific to what we do and how we have set our system up but the majority of the content is pretty generic. Some I have borrowed from what Julie Oke has done.
It is not meant to be all inclusive and I am hoping that others will add to it and share as well.
Mailbox Management
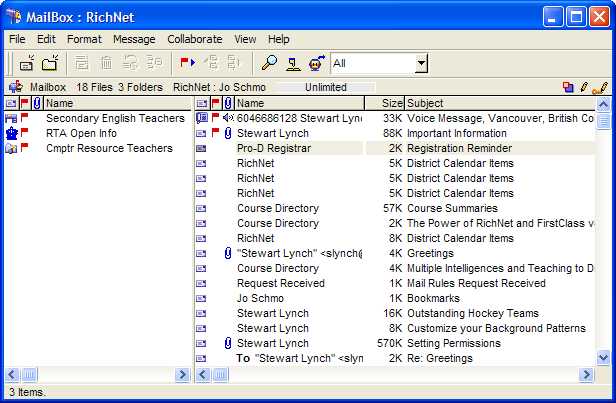
Split View
Change your mailbox view from
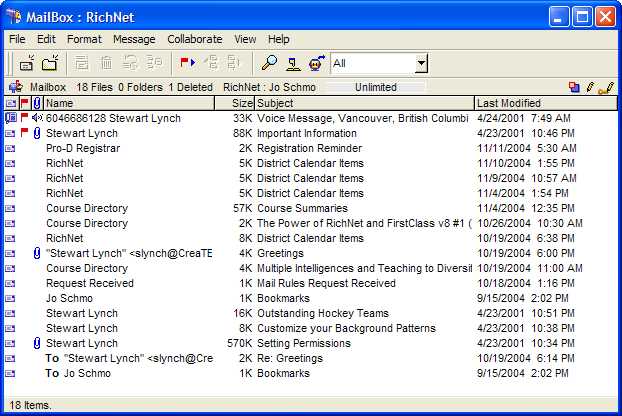 to to 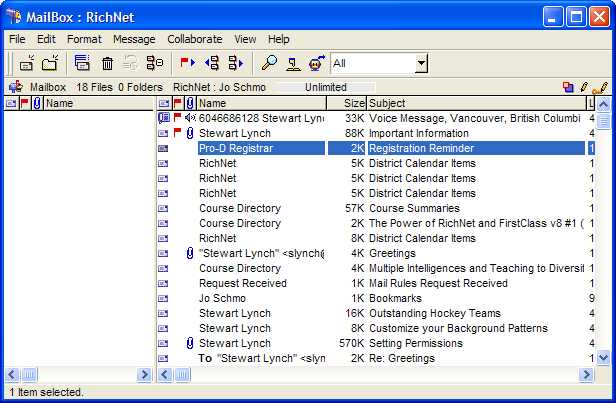 by running the by running the  from the Applet Centre (found in the Important Info Conference). from the Applet Centre (found in the Important Info Conference).Now you can drag aliases of all of your important conferences in to your mailbox so that when you open your mailbox you see all important conferences too. You can do this by finding a conference somewhere and clicking on it once (do not open it). Then choose Collaborate > Add to Desktop. Once the conference is on your desktop, drag it on to the Mailbox icon.
Sorting and Grouping
Clicking on any column
To Group items, hold down the <Control> key on a PC or <Option> key on a Mac and click on a column. This will group the list by the column. For example, if grouped by subject, it will group all messages in the same message thread. This is the normal grouping. The "Grouped" column will have a
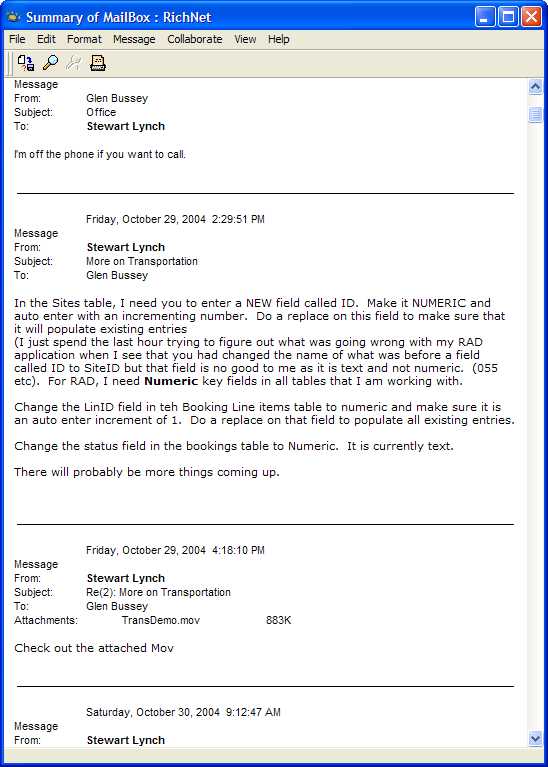
Select Similar Items and Summarize Selected
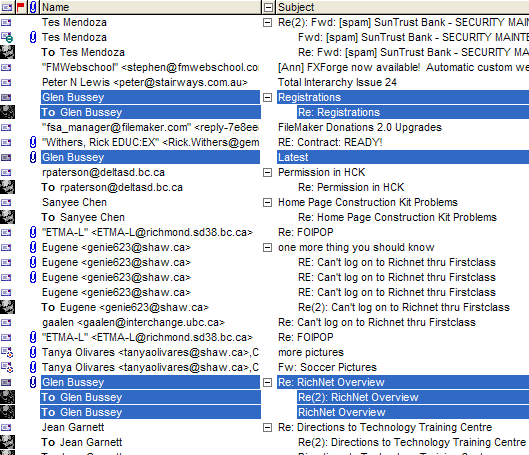
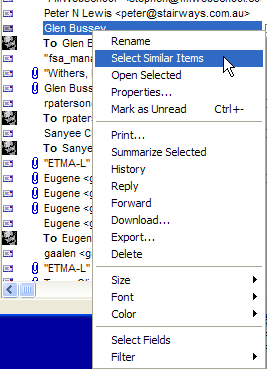 If you are looking for all postings in your mailbox that are to or from an individual, you can click on one message and then on a Mac, hold down the control key and choose 'Select similar items' from the contextual menu. On a PC, right click. This will select all items that are similar.... in this case by name If you are looking for all postings in your mailbox that are to or from an individual, you can click on one message and then on a Mac, hold down the control key and choose 'Select similar items' from the contextual menu. On a PC, right click. This will select all items that are similar.... in this case by nameYou can now choose Message > Summarize Selected to gather all of the selected messages in to a single text document.
Colour Lines
With version 8 of FirstClass you can now highlight and colour different lines. Select the lines you want and then choose the colour from the contextual menu. (On a PC, right-Click. On a Mac, hold down the <Control> key)
Reply with Quote
When you reply to a message with FirstClass V8 you now get date information in the header
Bruce Beairsto on Monday, November 01, 2004 at 8:18 AM -0800 wrote:
Forward
When you forward a message you now get the envelope information of the person who originally sent the message.
Filtering
You can now filter your mailbox to show different types of messages.
Open your mailbox and choose View > Filter and select from one of the options available.
Show Unread Items
Show Outgoing Items
Commonly known as your "Out Box" will show only emails that you have Sent
Show Incoming Items
Commonly known as your "In Box" will show only emails that you have received
Show Unsent Items
Will show only items that you have started composing, but have not yet sent. (Items with white flags
Environment Management
Summary bar on your desktop shows how much of your allotted disk space you have left
A user with unlimited disk space see this:
A user over his disk limit will see this:
Toolbars
Every FirstClass container has its own Toolbar that contains a variety of different icons to make it easier for you to work with messages etc.
If you open a message, the toolbar changes to show icons that are relevant to an open message
You can modify these toobars to meet your specific needs.
Choose View > Toolbars > Customize Toolbars...
This will bring up the Customize Toolbars selection dialog.
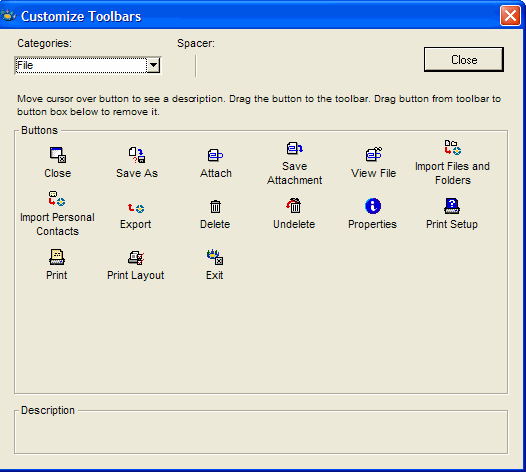 Choose a category from the pop-up selection field and you will be presented with the range of buttons that you can add to your toolbar. Choose a category from the pop-up selection field and you will be presented with the range of buttons that you can add to your toolbar.To add to your toolbar just drag the button from the display to the toolbar. You can position it anywhere you like.
To Remove a button from your toolbar, drag from the toolbar to anywhere on the customization box.
Here is how I have modified 4 of my toolbars.
Sent Message Toolbar
Received Message Toolbar
Message Composition Toolbar
Mailbox Toolbar
Preferences
There are a host of other items that you can adjust based on your personal preferences. Select Edit > Preferences. To discover what each of the different options mean, choose Help > About this Window to bring up the Help screen that will describe each of the options.
If things get really messed up, open your preferences and choose
Note: Some settings have been disabled by the system administrator.
View Properties
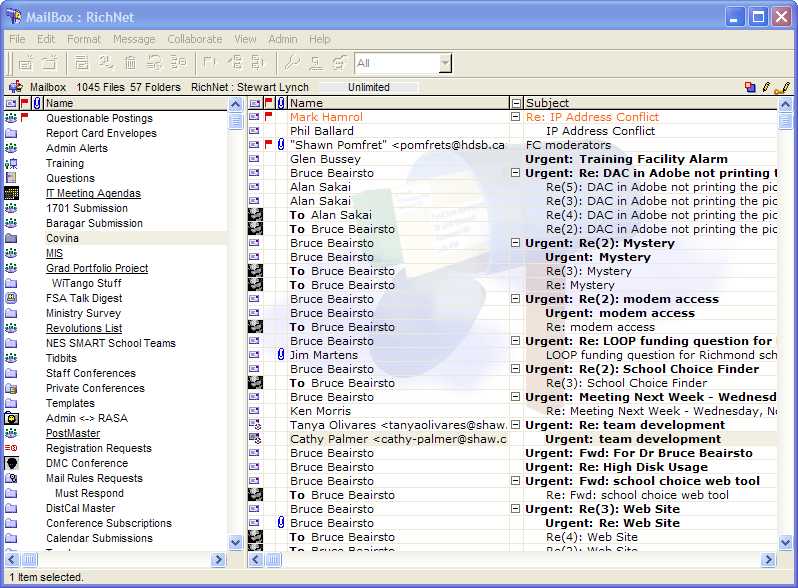
You have the ability to change the View Properties of your mailbox. We have already discussed how you can change the sorting and grouping. You can also change things such as the background image and other display properties. Open your mailbox and click on the side of the mailbox that you want to adjust if you have split your mailbox into two sections. Choose View > Change View Properties. As with Preferences, you can choose Help > About this Window to bring up the help screen that describes what each of the different options will do.
Here is how I have set up my mailbox.
Note the grid lines and the mailbox image in the background
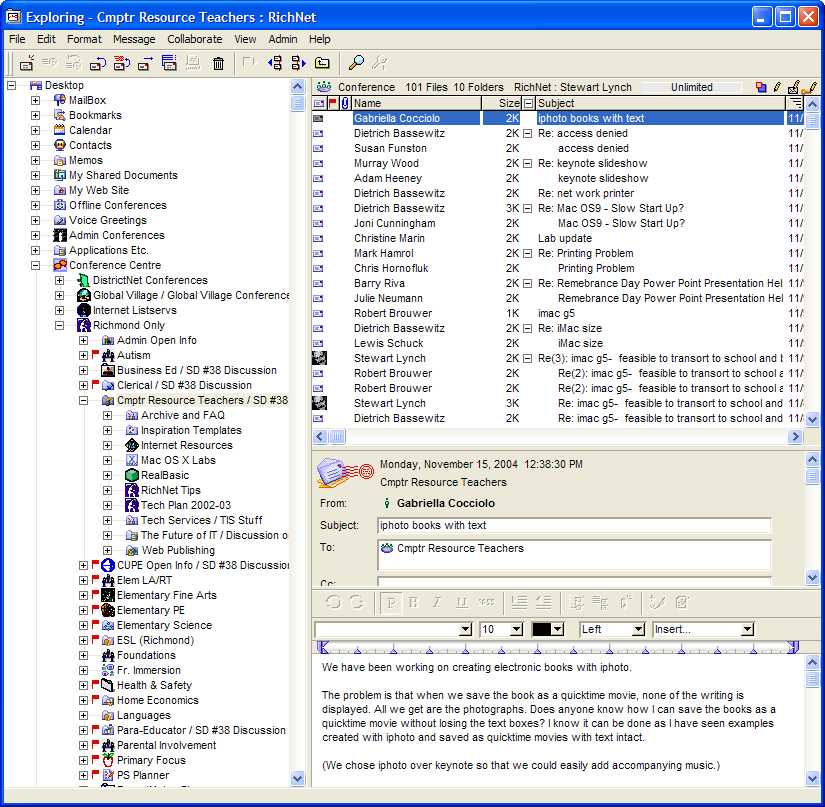
Explore view
Explore view was introduced in version 7 of FirstClass.
Choose View > Explore to change your view to this different way of navigating your FirstClass content.
Once you have your mailbox or conference open, you can use the Space Bar on your keyboard to navigate through messages.
Message Management
Changing Icons
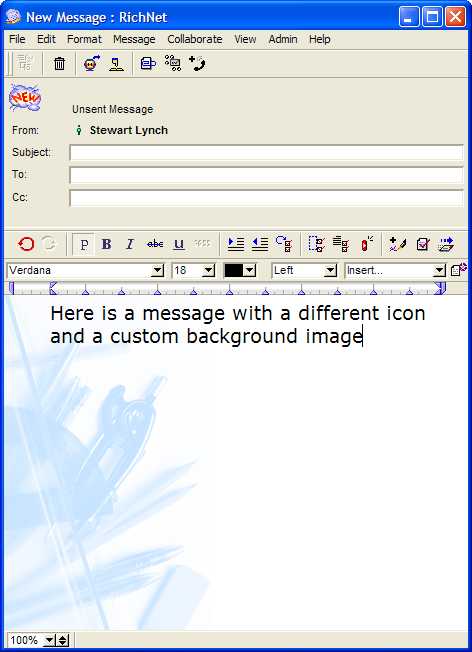
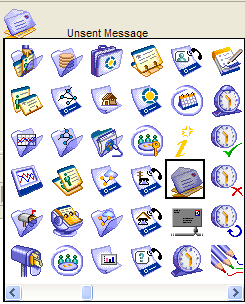 You can change the Icon on your outgoing messages so that when they arrive in another FirstClass mailbox they will have the icon that you have chosen. Before you send the message, click on the envelope icon on the top left of the message You can change the Icon on your outgoing messages so that when they arrive in another FirstClass mailbox they will have the icon that you have chosen. Before you send the message, click on the envelope icon on the top left of the message Background Images/Colour
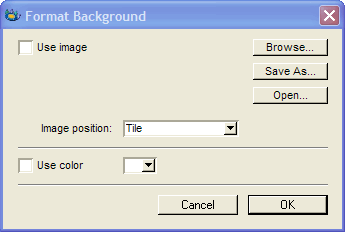 You can change the colour of the background of your email or add a background graphic before sending it. Choose Format > Format Background to bring up the formatting dialog. You can change the colour of the background of your email or add a background graphic before sending it. Choose Format > Format Background to bring up the formatting dialog.You can choose a colour from the colour selector or you can click on
With FirstClass 8 you can quickly insert a background image by just having any image on your clipboard. Select any image that you have found either on the web and copy it to your clipboard. Choose Edit > Paste Special... then
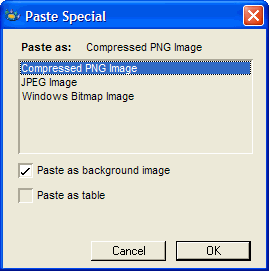 You may have to then choose Format > Format Background and remove the Tile option to have a single copy of your image only as the background.
Content View
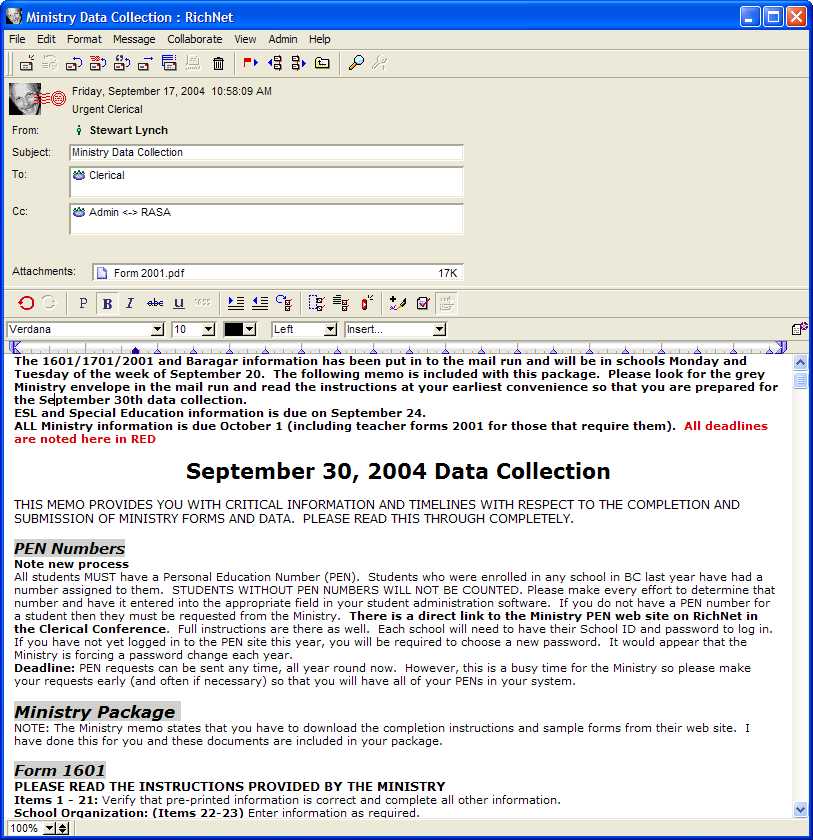
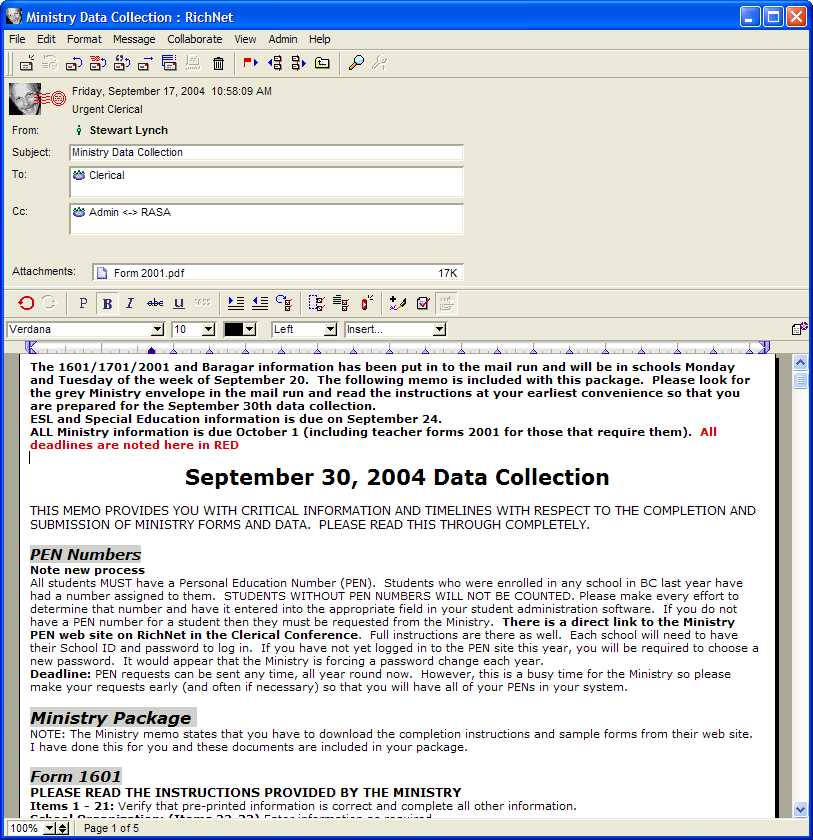
You can also choose how you might want to have your message displayed when it is sent. Choose View > Content> Page Width View and the message will appear as it will be printed.
Normal View
Page Width View
Personal Stationery
If you have a message that you send out regularly you can create Stationery messages. To do this, create the message but do not address it to anyone. Put your subject in and all of the content of the message that you send out. You can even have attachments. You might want to put in place some place holders such as Dear <<firstName>> so that you can do a Find and Replace on the placeholders once you have "torn off" a new message from your stationery pad. Now, close the message that you have created but not sent and choose File > Get Info.... (Mac) or File > Properties... (PC) and click on
If you have your mailbox split into two sections the stationery object will jump to the left (or upper) section.
I create a folder in my mailbox called Stationery items and drag all of my stationery into that folder.
Tables
You can now insert tables in a message body.
(This is big as you can now use the Home Page Construction Kit too to build tables and have them rendered out to the web.)
Warning:If you are sending messages to other people and have used Tables, if they are not using version 8 of the client, they will not see the table.
Here are snapshots of how a table will appear.
Using FirstClass 8
Using FirstClass 7.1 or earlier
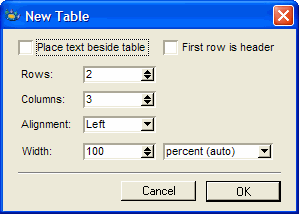
To create a table, choose Edit > Table > Insert Table
You can choose the number of columns and rows that you want.
Once the table has been paced in the body of the message or document you can adjust the cells by hovering over a line
 and adjusting the width or height. You can modify cell backgrounds by selecting the cell(s) and choosing Format > Format Cells and adjusting the width or height. You can modify cell backgrounds by selecting the cell(s) and choosing Format > Format CellsCalendar
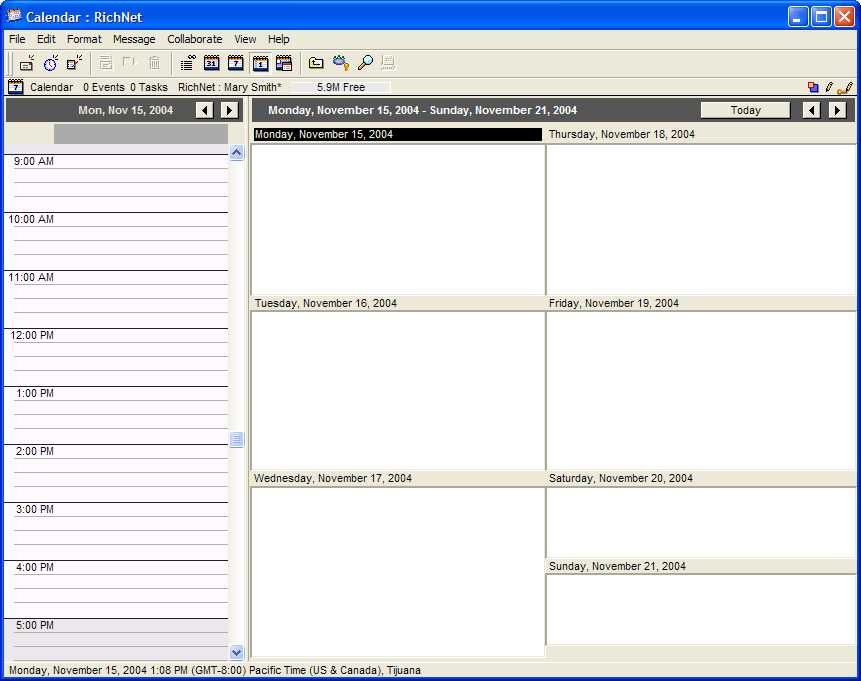
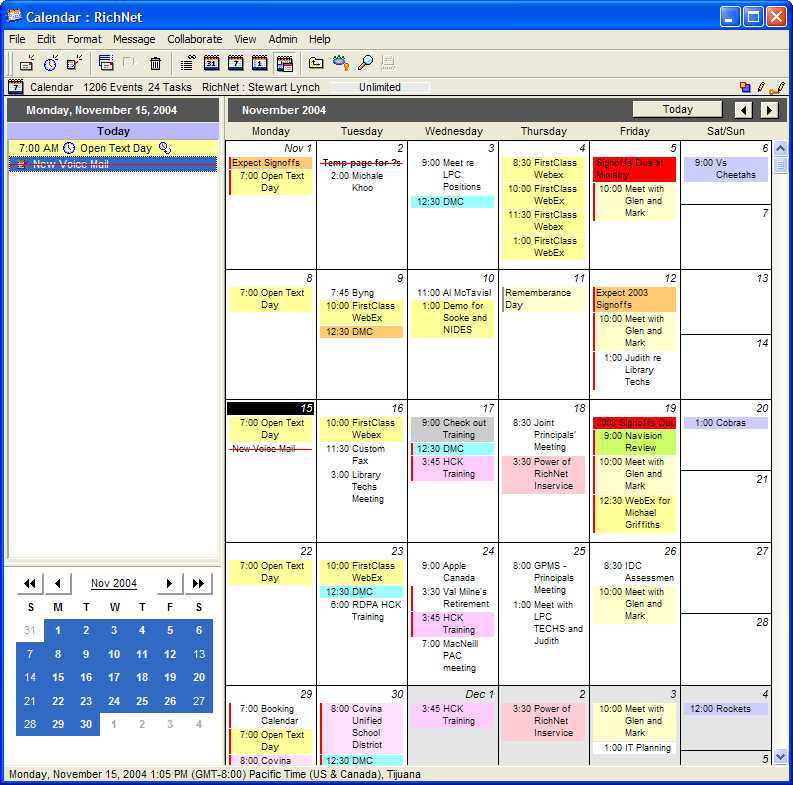
The calendar has been completely revised
Both the left and right panes can be modified to show different views. Click on each side and click on one of the different buttons to alter the display
I choose
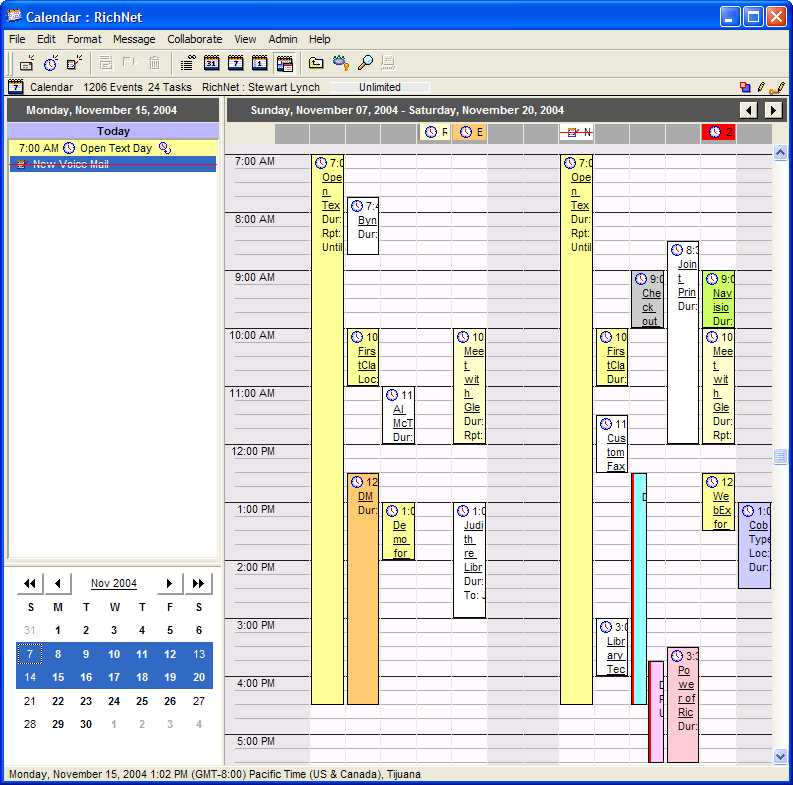
You can view multiple weeks in week view
Other new features include
� create untimed events, which show at the top in day view
� specify default reminder timing for events and tasks that you create
� set a "snooze" time for reminders, to make them reappear
� change the category and color of received events, and change their reminder specifications
� accept invitations on a tentative basis
� invitations from users without permission to add events to your calendar are sent to your Mailbox
� participants are automatically asked to respond
Instant Messaging and Presence Management
Rˇsumˇ
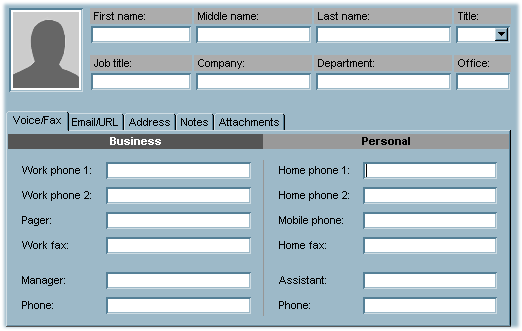
When a user clicks on a user's name or goes to his own rˇsumˇ, he'll be presented with a new form. It the same form as the FirstClass contact form. If a user double clicks on a personal address - someone outside your FirstClass system - he gets this form. If a user clicks on a FirstClass user's name, then he gets the same form.
Note: Just because the form has a place for a home number it doesn't mean you should fill it in. Also note that if you do not have a My Web Site folder on your Desktop, the rˇsumˇ can be seen by unauthenticated web site visitors.
Bolding of Who is online
When creating or reading mail a user will see names bolded within the message form. A bolded name anywhere indicates the user is online.
Current conference participants
Instant Message
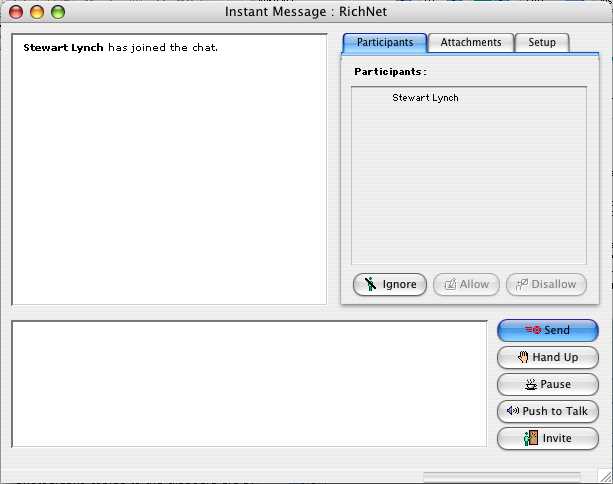
Chats are now called instant messages, and public chats are called chat rooms
The first thing is the name change, to start a private chat a user will choose Collaborate > Instant Message.
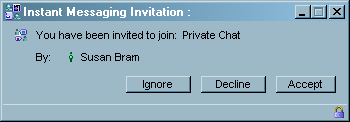
If the invitee clicks Decline, the invitor sees a message in the Instant Message document. Clicking Accept starts the instant message. Any other action - Clicking Ignore or closing the window by any means, will behave just like 7.1 - the invitee receives no feedback.
New features include:
� format text and embed pictures and recordings in instant message transcripts
� can moderate instant messages
� attach files to instant messages
� save instant message transcripts
� control what users who enter instant message sessions in progress see in the transcript
� let others in the instant message session know you are temporarily unavailable
Bookmarks
Bookmarks are a very underutilized feature of FirstClass. Many people use the bookmark feature of their browser, but that is specific to your computer. What if you move to another computer at home as opposed to work. Your web bookmarks are not available to you.
Use your FirstClass bookmarks folder
To create a Bookmark to anything on FirstClass, select the item and choose Collaborate > Add to Bookmarks... an this will allow you to give it a specific name. How is this different than just adding a conference to your desktop and then dragging it in to your mailbox? Bookmarks allow you to get quick access to items that cannot be added to the desktop such as FirstClass RAD applications.
If you are using Internet Explorer, you can open your web browser and simply drag the Address URL
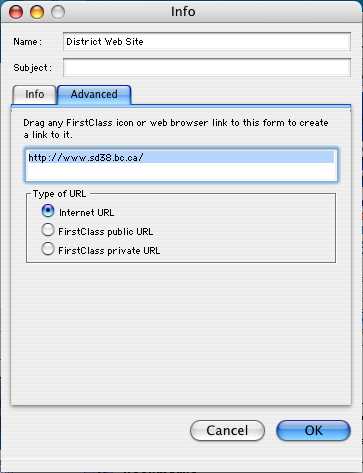 If you are using other web browsers like Safari, you will have to choose File > New > New Bookmark to create the New Bookmark. You can then give the bookmark a name, click on the Advanced Tab and now drag the URL from the address in to the space provided If you are using other web browsers like Safari, you will have to choose File > New > New Bookmark to create the New Bookmark. You can then give the bookmark a name, click on the Advanced Tab and now drag the URL from the address in to the space providedContacts
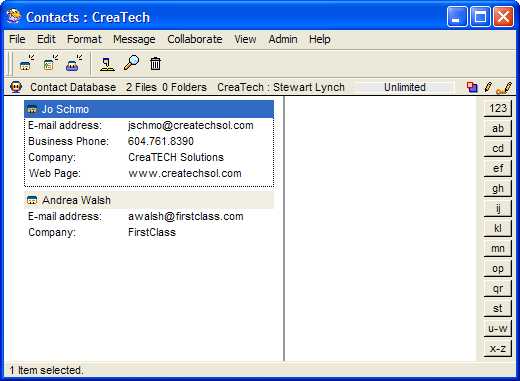
The Address Book folder has been renamed Contacts. When the folder is opened, you will see index buttons on the right side of window. The index buttons magically adjust depending on the size of the window. For the purpose of the screen I made the window very small so there's only a few buttons, as the window is stretched, more buttons will appear. Click on the button will take you to the first instance of the letter. For example, clicking on IJ will take you to Jo Schmo.
All address forms now have a message body, so user's will be able to create a huge quantity of notes, upload images, and use rich text.
Adding a New Address Entry
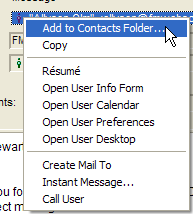 If you receive an email from someone on the Internet and you want to quickly add it to your contacts list, Right Click (PC) or hold the <Control> key down (Mac) on the address and the contextual menu will be dislplayed with an option of adding to yoyur Contacts folder. Selecting this will create a new contact entry with the Internet Address already entered in to the mail field. Now all you have to do is add
the friendly name. If you receive an email from someone on the Internet and you want to quickly add it to your contacts list, Right Click (PC) or hold the <Control> key down (Mac) on the address and the contextual menu will be dislplayed with an option of adding to yoyur Contacts folder. Selecting this will create a new contact entry with the Internet Address already entered in to the mail field. Now all you have to do is add
the friendly name.Web Interface
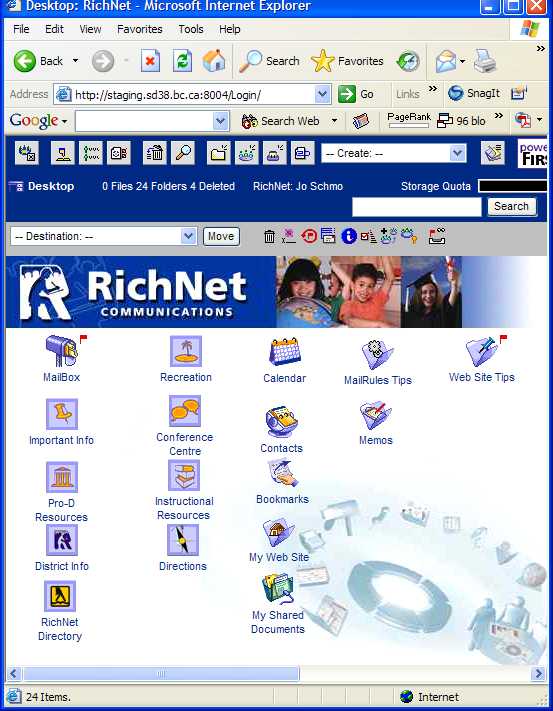
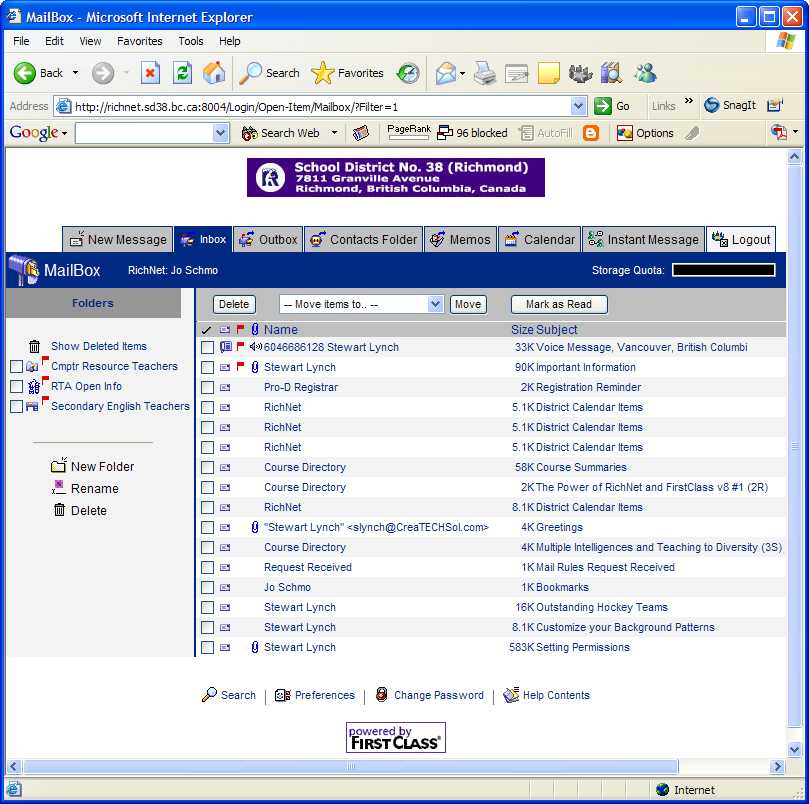
We always recommend the FirstClass client as your main way to access this system. However, if you do not have access to the FirstClass client, you now have two options for logging in via the Web.
At our Web Site you can click on Login to RichNet.
Web Login
This is the original method that tries to simulate the FirstClass Client experience
Simple Web Login
This will take you directly to your mailbox. Note, however that you do not have access to your desktop, but you do have access to any aliases of conferences that you have placed in your mailbox.
Mail Rules
Mail rules were introduced in version 7.1 of FirstClass. They are very powerful an allow you to trigger all sorts of actions (such as redirecting or rejecting SPAM) upon receipt of a message. You have to be careful when you use Mail Rules however so for this reason, you have to request permission to gain that privilege. Please visit the Important Info conference and submit the
 to access this feature and to
get more information on how to create Mail Rules. to access this feature and to
get more information on how to create Mail Rules.Home Pages
You can request permission to host your own Web Site. We do not allow people to create and host web sites for personal gain so you must request permission. Please visit the Important Info conference and submit the
*******************************************
........
: o/ : Stewart Lynch
: <| : Director of Instruction, Technology and Information Services
: / > : Richmond School District
:......: Richmond, BC Canada
Internet: slynch@richmond.sd38.bc.ca
(Above website created with Home Page Construction Kit)
tel. (604) 668-6128 fax: (604) 668-6006
or
604.761-8390 (Cell)
*******************************************
| ||
